Monday, June 27, 2011

Garlic Ginger Tofu


I can't believe I have never posted about this before. This is one of those staples in my house that comes about once a week. I make slabs that go on Gregg's sandwiches and cubes that are tossed over quinoa or used in Pad Thai. Definitely my go-to tofu preparation, that can take on endless variations with grace. Try replacing the ginger with dried thyme for an Italian twist or fresh curry powder for an Indian profile.

Tofu is not my favorite soybean product since it is pretty white and processed, but sometimes it does just hit the spot. High in protein, low in carbohydrates, it is a versatile medium for a variety of flavors. I have never had much luck with cold marinades, but I love it simmered in a sauce, which seems to help infuse the flavor.

I love this tofu served as part of a macrobiotic meal with plenty of whole grains and vegetables, since it is essentially pure protein on it's own. It is important to consume nutrients together as they are not processed well in isolation within our system (it is all about the synergy!). It is wonderful with a peanut sauce over sauteed kale and fluffy basmati rice, or as part of a sushi bowl with creamy avocado, crisp vegis and a wasabi dressing.


Garlic Ginger Tofu

Serves 6

Ingredients

14 oz. extra firm tofu ( I love Vermont Soy, if you are from the area)
2 tbs. tamari
¼ cup water
1 tsp. ginger powder
1 tsp. garlic powder
2 tbs. nutritional yeast, or more as needed


Directions

Preheat oven to 350 degrees.

Combine water, tamari, ginger and garlic powder in a large skillet. Drain tofu and cut into cubes (about 24). Add tofu and bring to a simmer. Stirring occasionally, simmer until all of the liquid has been absorbed. Add nutritional yeast and toss to coat. Sprinkle with more if necessary.

Place coated tofu cubes on a parchment lined baking sheet and bake for 10 minutes or until golden brown, stirring half way through. 


Relax. Eat Well.

Thursday, June 9, 2011

Tempeh Sausage


So I created this (in my opinion) amazing tempeh sausage yesterday (Gregg said they needed to have more sausage in them!). But somehow I failed to take any pictures!! Luckily I have a few creations today using the sausage, so that will have to be your eye candy this time around. I have been doing recipe tests for this sausage on and off for a year now, but this is my favorite version yet. The flavor is all there, and with sparse liquid and the addition of cooked rice, the texture satisfies as well.

Tempeh is a fermented soybean product, meaning it has live beneficial bacteria and is easy to digest and assimilate (believe it or not, soybeans can be hard for many people to digest). (I just realized I use a lot of parenthesis). (Moving on...). Made from whole soybeans, it is extremely unrefined and PACKED with both protein and fiber. Around these parts, we are lucky to have a local company producing tempeh from VT soybeans. I love Rhapsody Tempeh, and often buy the large 2 lb block and freeze what I don't need that week.


A few more local spotlights worth mentioning: I have been loving The Lacroix Farm's fresh eggs and rumor is they will creating a farm stand this year with local produce as well. Can't wait! Find them on Rt. 100b between Moretown and Middlesex, a wonderful farm and even more amazing family, Keith and Rae-Anne are the real deal. This strata gets it's bright yellow hue from their delicious eggs.


Kingsbury Market in Waitsfield produces amazing naturally leavened (sourdough) breads and pizzas. I have been buying their pizza crusts to make special homemade creations, featured in the above pizza Gregg made today with the tempeh sausage, red onion, sundried tomatoes and wild ramp pesto. Their greens are wonderful (and clean!) as well.

I am only going to post the tempeh sausage recipe, but the strata was a improv creation using homemade gluten free bread chunks (you could use any stale crusty bread you have around), broccoli florets and tempeh sausage steeped in whipped eggs, soymilk, salt and a dash of nutmeg. Topped off with a thin layer of cheese, soaked overnight and baked at 400 degrees for about 55 minutes covered. Simple, easy and scrumptious!


Tempeh Sausage

Serves 6

Ingredients
2 garlic clove, minced
¼ cup onion, minced
1 8 oz. package tempeh, crumbled
1 cup rice, cooked
1 tbs. fresh sage (or 1 tsp. dried)
1 tbs. fresh thyme (or 1 tsp. dried)
1 tbs. fresh rosemary (or 1 tsp. dried)
1 tbs. tamari
1 tbs. ketchup or raw apple cider vinegar
1 tsp. chipotle powder
1 tbs. ground flax seed soaked in 3 tbs. water
½ cup apple, minced

Directions
Preheat oven to 375 degrees.
In large food processor, mince onion and garlic. Add rice and tempeh and pulse until well processed and beginning to form a ball. Add remaining ingredients and continue to pulse until combined.

Shape mixture into patties and place on a parchment paper lined baking sheet. Bake for 10 minutes, flip and continue for another 5 minutes, or until golden brown.  

Relax. Eat Well.

Monday, May 30, 2011

Vegan Ice Dream


Be prepared for a summer revolution (or revelation?).

You know those days when the sun will not stop beating down and all you want is cold ice cream to slowly savor all day long? Here is your answer: an amazingly decadent ice "dream" made solely from frozen bananas. Smooth, creamy, refreshing and HEALTHY! It truly does not get any better than this. It is the kind of recipe that only comes along once in a great while, the kind you make every day and wonder how you ever survived without. Oh man, get ready.

I like to buy a big batch of bananas and freeze them at peak ripeness. Make sure to peel and roughly chop them before freezing, as they are impossible to work with frozen in the peel. There you are: all ready to go with a crop of frozen bananas waiting for you at any moment, stalled in the peak of their perfection, posed to satisfy any summer whim.

Bananas are super high in potassium, which acts to balance out sodium within our system. The ideal ratio is 2:1 (potassium:sodium), which is unfortunately no where near where most of us are on a daily basis. But with a little extra attention, you can increase your potassium through whole foods such as bananas and potatoes (leave the skins on!) and significantly boost your heart health. If you are not a huge potato skin fan, save the peelings and use it to make a broth to cook your grains in throughout the week. Other winners are beets, cantaloupe, winter squash and spinach.

There are a few add-ins that I particularly enjoy, which offer some interesting twists and can take the idea anywhere from breakfast to dessert. In the morning I like to add in ground golden flax seeds and frozen blueberries. Once for lunch, I even added a handful of kale. That's right, and it was delicious. My CSK members today enjoyed it spiked with a splash of soy milk, a dash of vanilla and a spoonful of peanut butter. Bam: Peanut Butter Milkshake. You get the idea....


Vegan Ice Dream
Serves 2

Ingredients

2 bananas, peeled, roughly chopped and frozen

Optional add-ins: 2 tbs. ground flax, 1/2 cup frozen blueberries or strawberries, 1 tbs. peanut butter, 1/2 tsp. vanilla, dash of cinnamon...

Optional toppings: cocao nibs, toasted coconut, fresh fruit, granola


Directions


In a food processor, whip frozen bananas and add-ins until creamy and frothy (about 2 minutes). Scrape into 2 serving bowls and sprinkle with desired toppings. Enjoy immediately, or store in freezer for up to an hour.


Relax. Eat Well.

Friday, May 20, 2011

Spring Greens Salad


This salad is a celebration of the spring greens popping up and adorning our landscape, as well as a tribute to some of the winter staples that helped us stay local during the long winter months. A melding of winter to spring, cold to warm, root to leaf.


Spring has certainly been fighting its way in these past few weeks, and for me it has brought with it a myriad of new projects and significant "firsts". First big solo catering job in the new kitchen, first few weeks of my prepared meal service (CSK), first days cooking at home as my "real" job, and my first vegetable garden!!! I can't complain really. But aside from work and the kitchen, it has also brought along a bundle of home projects uncovered by the melting snow that are at once exciting and totally overwhelming. One (small) step at a time, right? Someday our yard won't look like a mud pit, I swear.


Anyway, back to the recipe. This is a nice mix of simple ingredients that comes together to become more than the sum of its parts (which I might add, is usually the goal of cooking). Toasted seeds become your crunch, the raw shredded beets add a brightness in their color and flavor, currants offer a subtle sweetness and the entire salad is coated in a very light and simple honey lemon dressing. All summed up on a bed of tender mesclun, you really can't go too wrong.

Fiddleheads is running its first class out of the new kitchen on June 8th, from 6-8pm on Entree Salads and Homemade Dressings. Come learn how to lighten up with fresh, ingredients that satisfy your every craving, made from scratch. Check out the full description at http://www.fiddleheadscuisine.com/Events.html and Email me at Fidddleheadscuisine@gmail.com to sign up.

To spring. To all things lighter, and brighter.


Spring Greens Salad with Currants, Shredded Beet and Toasted Tamari Seeds
Serves 4

Ingredients
4 cups mesclun
1 large beet, ruby or golden (or both!)
1/4 cup currants, or quartered figs
1/4 cup sunflower seeds
2 tbs. pumpkin seeds
1 tbs. tamari
1 tsp. maple syrup
1/2 tsp. ginger powder

Juice and zest of one lemon
2 tbs. apple cider vinegar
2 tbs. extra virgin olive oil
2 tsp. honey
1 garlic clove, minced
1 tsp. white miso
salt and pepper to taste


Directions
Shred beet using a box grater and set aside. In a cast-iron skillet, toast sunflower and pumpkin seeds over medium-low heat for a few minutes, until slightly golden. Add tamari, syrup and ginger to the pan, toss to coat and continue to cook until liquid has evaporated. Remove from heat and let cool.

Meanwhile, place lemon juice through salt and pepper in a blender and blend until smooth and emulsified. Taste and adjust seasonings.

To assemble salad, toss mesculin, half the shredded beets, currants and dressing in a large bowl. Portion into smaller bowls and top with toasted seeds (breaking up clumps as you sprinkle) and the remaining shredded beets.

Relax. Eat Well.

Monday, May 2, 2011

Buckwheat Cheese Sticks


I have been a busy busy bee in the kitchen lately. A lot of firsts this week: first big catering gig out of the new kitchen and first CSK day today! Tonight was Thai, and for those of you who received a meal, I hope you enjoyed it! It felt great to have it all come together for the first time (although I think I need to go pass out now).

Luckily I had a few helper bees home today to form a last minute spring roll-ing assembly line because I definitely underestimated how long it takes to roll 45 of em. Eeks! But they are just so delicious, I had to pamper my first-time customers... so it was all worth it.


In other news, I served these buckwheat cheddar straws at a 75th birthday party on Saturday, to a wonderful couple in Stowe and their extremely gracious friends. It was part of a cheese platter adorned with fresh fruit, turkish figs, maple tamari nuts and 6 extravagant wedges of cheese. A nice way to start or end a meal if you ask me.


The recipe started from Heidi Swanson's 101cookbooks.com, but morphed into a gluten-free version with rosemary instead of thyme. I did try it her way (with WW pastry flour) and decided I liked the gluten-free version better, as it has a complex grainy flavor that added to the rustic appeal. My next project will be to try a dairy-free version, with olive oil instead of butter... let me know if anyone tries it first!

These cheese sticks keep well for several days in an airtight container, and the dough can be made the day before they bake, if you are planning ahead. Just keep them in the fridge instead of freezer.


Buckwheat Cheese Sticks
Makes about 30

Ingredients
1/2 cup buckwheat flour
1/2 cup brown rice flour 
1/2 cup Teff flour
1 teaspoon fine grain sea salt
1 teaspoon fresh rosemary, chopped
8 tablespoons (4 ounces) unsalted butter, cold, cut into 1/4-inch cubes
3/4 cup cheddar, grated
1/2 cup ice cold water


Directions
In a food processor combine the flours, salt, rosemary and butter and pulse until you have a sandy texture. Add grated cheddar and pulse several more times. With blade running, add the ice water gradually until your dough comes together to form a ball. Remove dough from food processor, form into two flattened balls, place in an airtight container and place in the freezer for one hour. 


Preheat the oven to 400 degrees


Working with one ball at a time, remove dough from freezer and roll out on a floured surface, using a rolling pin, to about 1/4 inch thick. Slice into long strips about 1/2 inch thick using a sharp knife. Remove a strip and working the entire length of the dough, gently pinch the sides in. This will make it easier to roll as you create your round stick. Gently roll dough to about 1/4 thick, cut in half if ridiculously long, and place on a parchment paper lined baking sheet. Repeat with remaining strips, and second ball of dough. Give each stick enough wiggle room so that it won't attach itself to its neighbor. 


Bake for 8 minutes, flip, and continue baking for an additional two, or until golden brown. Cool, and enjoy!


Relax. Eat Well.


Friday, April 15, 2011

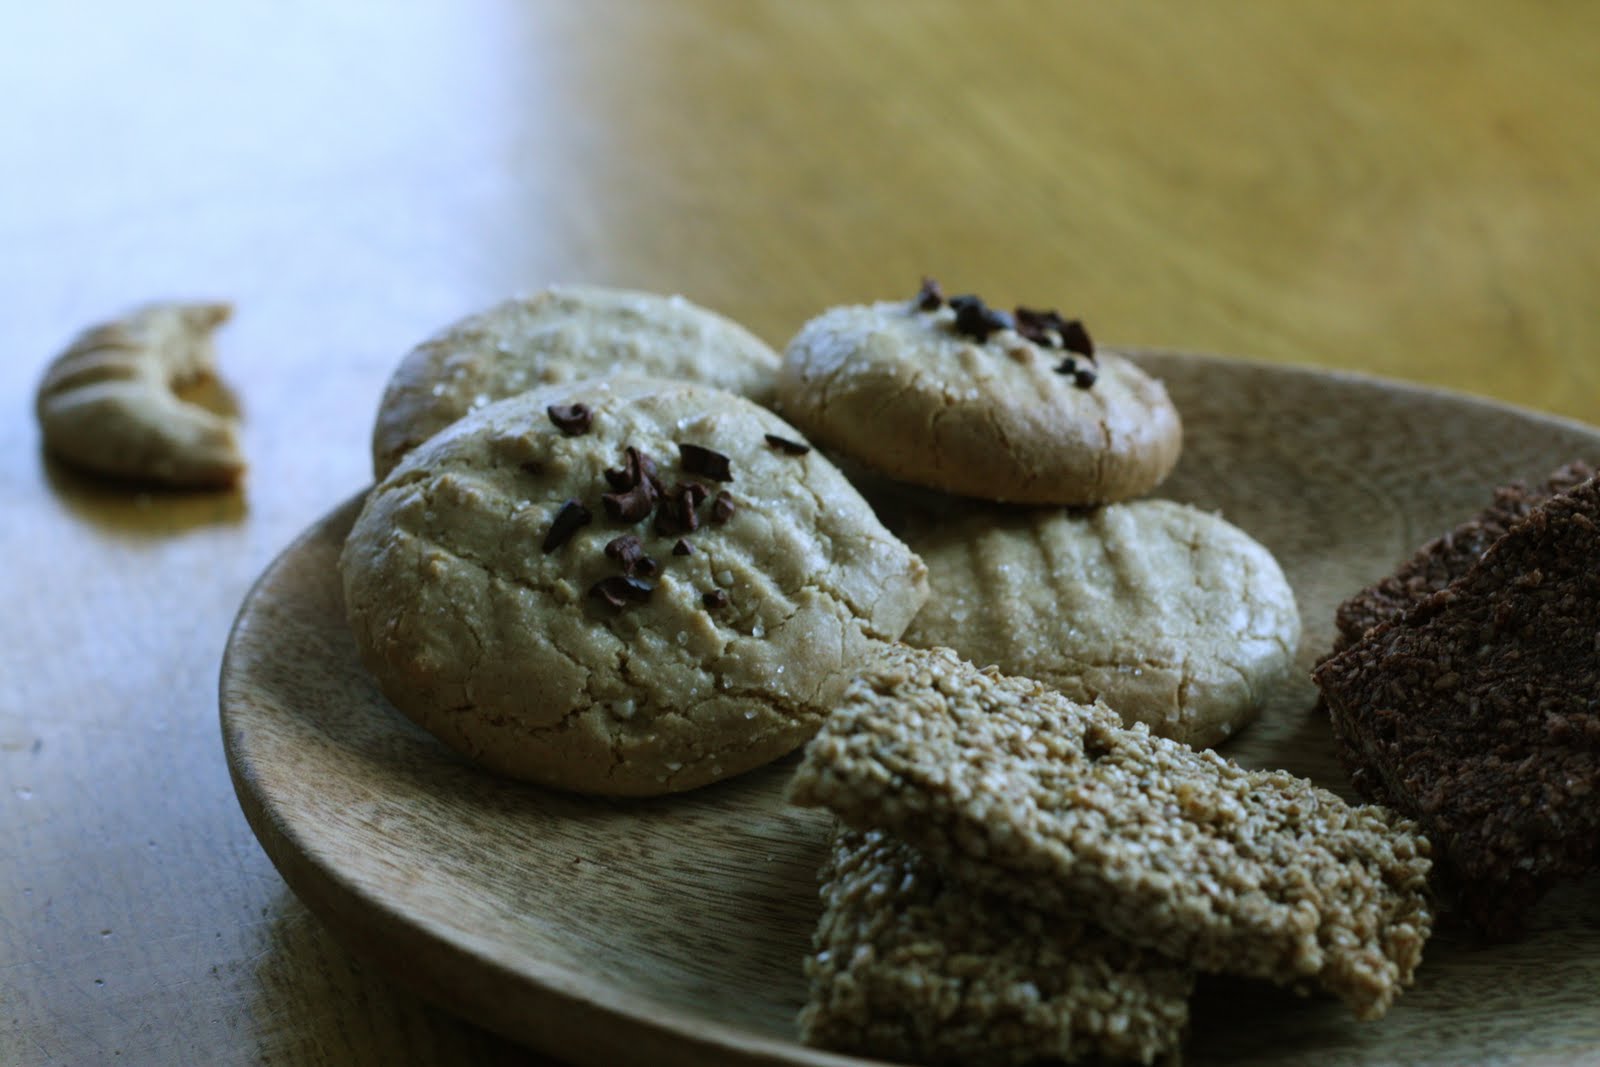
Cashew Butter Cookies


I feel like I have A MILLION things to do right now, but I am making myself sit down with a glass of wine (it is Friday, right?) and share this wonderful recipe with all you eager foodies. After all, that is why I am in the business to begin with: to share, create, be inspired and celebrate all that is GOOD FOOD. And this is good food.


The idea is simple: a play on the all-time favorite peanut butter cookie, with a slight twist. Instead of jarred peanut butter which is 1.) a high allergen food and 2.) ground nuts that have then been exposed to oxygen at room temperature for who knows how long, we are dealing with freshly ground raw cashew here, baby. Nuts are chock full of (delicious) volatile oils, which go rancid quickly when ground (exposed to oxygen), toasted (exposed to heat) and left at ambient temperatures for too long. The best way to embrace the (delicious) nutrition inside that nutty package is to buy them raw, store them in your freezer, and grind them just before consuming. 

So anyway, as I am having deja vu as I type, I am sure you have heard it all before :) The short and long, this is a (delicious) new version that you just have to try! A number of flours can be used, but I like whole grain spelt flour if you can tolerate a bit of gluten, as it has a great texture, yet still offers some diversity to the diet. I have also made them with brown rice flour, to the delight of a different crowd. Have fun, enjoy, and don't forget the forked criss-crosses!

Cashew Butter Cookies
Makes 15 cookies
Ingredients
1 cup spelt flour
½ teaspoon baking soda

½ teaspoon fine grain sea salt

½ cup cashews
½  cup honey, agave, maple syrup,
 or a mixture
3 tbs. extra virgin olive oil

1 teaspoon vanilla extract
Cane sugar, for garnishing
Directions
Preheat oven to 350F degrees.
In a large food processor, grind the cashews to a smooth butter. 
In a medium mixing bowl combine the flour, baking soda, and salt. In a separate larger bowl combine the cashew butter, sweetener of choice, olive oil, and vanilla and stir until combined. Pour the flour mixture over the cashew butter mixture and stir. Let sit for five minutes, give another quick stir.

Roll a tablespoon of the dough into balls and place on baking sheet lined with parchment paper. Using a fork dipped in water, flatten each cookie with a criss-cross pattern. Sprinkle with cane sugar to garnish. Bake for 10- 11 minutes, making sure not to over bake them as they will dry out. Let cool and harden slightly before enjoying.

Last time, I served them in a platter with Sesame Kelp Bars and Living Fudge.


Relax. Eat Well.