Showing posts with label summer. Show all posts

Friday, July 13, 2018

Salted Caramel Cashew Ice Cream


With summer heat waves in full force across the country, ice cream has been on my mind. But let's face it, probably not the best treat to be indulging in every day, which is roughly how often we seemed to be consuming it. So I decided to go searching for a healthier version that I could feel good about serving my family. A simple search found that I was not alone.

The key to these cashew based ice creams is the dates. Not only do they deliver a caramely sweetness, but they keep the ice cream silky in texture, as opposed to solely sweetening with syrup or honey, which yields an icier result.


The ingredient list is simple, there is no churning or ice cream machine involved, and you'll have healthy ice cream to enjoy directly out of the freezer. If you do not have a high powered blender, such as a Vitamix and Blendtec, I would recommend soaking the cashews and pitted dates for several hours in the milk, to soften them up enough to blend smoothly. 

The cinnamon packs a punch- you can take it down a notch by halving the amount if you prefer. The flaky sea salt is also optional. I love it, but my three year old is less sure, so know your audience. 


Finally, this is not the kind of ice cream you want sitting around for too long in your freezer, I find that after a few days it starts to loose some of it's silky texture. Best made in small batches and enjoyed often.

Salted Caramel Cashew Ice Cream

Inspired by Blissful Basil

Ingredients

1 1/4 cups unsweetened plant-based milk
1 cup pitted and packed soft, sticky medjool dates (about 12 dates)
3/4 cup raw cashews (heaping)
2 tbs. maple syrup
1/2 tsp. cinnamon
1/2 tsp. fine-grain sea salt
1/8 tsp. flaky salt for top

Directions

Place all ingredients except for the flaky salt in a high-speed blender and process until very smooth, scraping down sides as needed. Pour into a parchment paper lined dish and sprinkle with flaky salt. Freeze until hard, at least 6 hours. In the first few days, this scoops beautifully right out of the freezer. If it lasts more than a few days, let sit for a few minutes before serving.


Friday, June 16, 2017

Roasted Red Pepper Hummus


The genius of this recipe is in the preparation of the chickpeas. Soaking and cooking the chickpeas with baking soda changes the acidity, and allows for a pillowy bean that purees away in to a silky dip or spread. It's truly magical.

I definitely did not come up with this one on my own- it is greatly inspired by Chef Solomonov of Zahav in Philly.

Don't be afraid to make this in a bigger batch- say triple, and then portion and freeze it. The originator might disagree, correctly explaining that hummus is best served fresh and never refrigerated. However, we all live in reality, where time is precious and frozen staples can be your ticket to healthy eating during the busy work week. So I give you permission.

The variations are endless here- we like to try to change it up every time we make a batch. Take out the roasted red peppers and add cilantro or basil. Or roasted garlic. Try a healthy pinch of berbere spice blend for a Ethiopian flavor. Or curry powder for an interesting kick. Keep it simple, or play with complexity, it's all good.


Roasted Red Pepper Hummus
Inspired by Chef Solomonov's recipe Hummus Tehina

Ingredients
1 cup dried chickpeas
2 tsp. baking soda, divided
2 garlic cloves
1 lemon, zest and juice
1 tsp. salt, plus more to taste
1/2 cup tahini, best quality you can find
1/2 tsp. ground cumin
2 roasted red peppers, about 1 cup chopped
Garnishes: a drizzle of olive oil and sesame seeds or z'atar

Directions

Soak chickpeas along with 1 teaspoon of baking soda overnight in plenty of water in a large bowl. Drain and rinse. Place in a medium pot with the remaining teaspoon of baking soda and water to cover the chickpeas by a few inches. Bring to a boil, and turn down to a simmer. Cook, uncovered, until very very soft, about an hour. You want them softer than normal- basically until they have no bite left to them. Drain and rinse with cold water.

In a blender, combine remaining ingredients. Process until very smooth, letting the blender run for almost a minute, scraping down the sides as necessary. Add water as needed so that it is blending easily.

Place chickpeas and tahini sauce in a food processor and blend until completely smooth. This may take a few minutes. Again, add water as necessary to reach the right consistency. Taste and adjust with additional salt and pepper. Serve garnished with a drizzle of olive oil and sesame seeds (and chive blossoms if they are in season!)

Sunday, May 21, 2017

Cracklin' Cauliflower


Guys, this one is good. Like eat an entire head of cauliflower good.

The spices almost create a breading which toasts up while the inside gets tender. The key is a longer roasting time in the oven with fairly frequent stirs.


My favorite uses are with some sort of Asian noodles (think peanut ginger sauce) or next to falafel, as we will enjoying them tonight. Or as a snack to pop in your mouth every 5 minutes as you struggle to pound out a blog post with the sun shining outside.

Cracklin' Cauliflower
Serves 2-3

Ingredients

1 medium head of cauliflower (4 cups florets)
1/2 tsp. turmeric
1/4 tsp. curry powder
1/2 tsp. garlic granules
a few grinds of black pepper
1/2 tsp. salt
1 tbs. nutritional yeast
1 tbs. coconut or grapeseed oil

Directions

Preheat oven to 375 degrees.

Chop cauliflower head into small florets and place in a large bowl. Toss with turmeric through nutritional yeast. Drizzle with oil and toss again to coat.

Spread on to a parchment paper lined baking sheet so that each floret has some wiggle room. This will ensure a crisping effect.

Bake for 40-45 minutes, stirring every 10 minutes, or until all florets are a golden brown and very tender.


Tuesday, October 4, 2016

Cauliflower "Couscous"


Cauliflower is really making a comeback these days, I'm not sure if you've noticed. Mashed Cauliflower, Cauliflower Pizza Crust, Cauliflower Steaks- is there anything it can't do?


Here is my version of a Mediterranean Couscous dish, that uses minced cauliflower to replace the grain. Simple enough to go under a heartier main dish (ragout or curried chickpeas come to mind), yet flavorful enough to stand up on it's own, this is a dish that will bring a smile to your lips without weighing you down.


Cauliflower Couscous

Serves 6

Ingredients
1 medium head cauliflower
1 tbs. coconut or olive oil
1/2 medium onion, minced finely
1 garlic clove, minced
1/4 tsp salt
1/4 tsp. pepper
dash of turmeric
a few sprigs fresh curry leaves, optional
1/4 cup golden raisins
2 tbs. parsley, or cilantro

Directions

Pulse garlic in food processor to mince. Add cauliflower florets, in batches, pulsing until you achieve roughly to the size of couscous.

Heat oil in a large heavy pan over medium heat. Add onions and cook until translucent. Add cauliflower and garlic and sauté for 5-10 minutes, until tender. Add salt, pepper, turmeric, curry leaves and golden raisins. Stir to combine. Remove to serving dish and garnish with parsley or cilantro.

Relax. Eat Well.


SaveSave

Tuesday, August 23, 2016

Pinto Bean and Vegetable Tamale Pie


I've been making tamale pies for some time, they are such a quick and easy twist on a traditional tamale, with a larger emphasis on the filling than the dough that surrounds it. They are easy to make in bigger batches, to freeze the extra portions, or serve to a crowd. 

Masa harina is a very finely ground cornmeal treated with limestone. It is the key to authentic tamale and tortilla dough- you should be able to find it at most well stocked natural food stores.

Feel free to vary the vegetables according to the season, just don't forget the ripe avocado and fresh cilantro for the top.

Pinto Bean and Vegetable Tamale Pie
Serves 4-6

Ingredients

1 tbs. coconut oil
1 medium onion, diced
2 cloves garlic, minced
1 medium yam, diced
1 tsp. cumin
½ tsp. dried oregano
1 red bell pepper, diced
2 ears corn, or 1 cup frozen, kernels removed
1/4 tsp. chipotle powder
1 tbs. tamari
1 ½ cups pinto beans, or one can
salt and pepper to taste

2 cups masa harina
1 tsp. baking powder
1-2 cups water or vegetable stock
2 tbs. olive oil

1 cup shredded cheddar or pepper jack, optional

Directions

Heat oil in a large skillet over medium heat. Add onion and sauté until translucent. Add garlic and yam, stir and cover. Cook for 15 minutes or until yam is soft, adding a tablespoon of water as needed to prevent sticking and stirring occasionally. When yam is soft, add red pepper, cumin, oregano and corn, cook 5 minutes. Add chipotle powder, tamari, beans and 1/4 cup water to skillet, continuing to cook until the ingredients have come together and the liquid has evaporated. Remove from heat.

Preheat oven to 375.

In a large bowl, combine masa harina and baking powder. Stir in 1 cup of water or stock and olive oil. You should have a firm but slightly tacky dough. If it seems too dry, add more water/stock as needed.

Transfer bean and sweet potato mixture into a small baking 9x9 baking pan. Spread masa dough in an even layer to cover. Top with grated cheese, if using.

Bake for 25-30 minutes, or until masa is firm to the touch and cheese is beginning to brown.

Relax. Eat Well.

Friday, July 29, 2016

Indian Stuffed Eggplant


I've been craving Indian food lately, and with a large order of local eggplants just in, I thought this would be a perfect time to share one of my favorite Indian preparations. This is a recipe I first learned from an inspiring chef, Thom, from the Millbrook Inn in Waitsfield. He hosted a wonderful Indian cooking class every summer based on his Peace Corps years there, and most of my staple recipes came from those classes. It's been adapted, paired down, then beefed up over the years, but it still reminds me of Thom every time I prepare it.


The variety of spices used in Indian cooking is not only responsible for the complex, satisfying flavors unique to that part of the world, but also the health benefits they impart. Turmeric, a potent antioxidant, helps fight free radicals and inflammation, while cumin, ginger and garlic all aid in digestion and boost the immune system.


You can use this stuffing with a variety of vegetables based on what is in season- tomatoes, summer squash and zucchini all work well.

Indian Stuffed Eggplant
Serves 2-4

Ingredients

1 large eggplant

1-inch slice of ginger
2 garlic cloves
2 tbs. roasted salted peanuts
2 tbs. chickpea flour
1 tbs. unsweetened coconut flakes
1/8 tsp. red chili flakes
1 tbs. cumin
1 tbs. coriander
1 tsp. salt
1 1/2 tsp. raw sugar
3/4 tsp. turmeric powder
1/8 tsp cayenne (optional)
1/2 cup cilantro
juice of a small slice of lime

2 tbs. coconut oil
1 tsp. mustard seed
1/2- 3/4 cup water

Directions

Cut a large cross into the eggplant, cutting halfway deep, careful not to let cut through completely.

In a food processor, mince garlic and ginger. Add peanuts, chickpea flour and coconut flakes. Pulse to mince. Add red chili flakes though lime juice and continue to pulse, scraping the sides down occasionally, until a crumbly paste forms.

Stuff paste deep into the cross in the eggplant.

Heat coconut oil in a large pan over medium heat. Add mustard seeds and cover, letting the seeds pop for one minute. Add eggplant, stuffing side up. Pour water into bottom of pan and cover to steam, cooking for 20-30 minutes, checking every ten minutes and adding water if necessary and rotating pan. Eggplant is done when soft all the way through.

Relax. Eat Well.


Wednesday, May 4, 2016

Peppercorn Pickled Ramps


Ramp season. You know it's my favorite. But it is so fleeting! This recipe will allow you to preserve your ramps to enjoy for months to come. 


For more on where to look for ramps, how to harvest them sustainably and a recipe for the greens you won't be using here, check out my Wild Dandelion and Ramp Pesto post. Or hop over to find out how to make them into a seriously addicting compound Ramp Butter. Both are great ways to fill your freezer so you will never have to be without. 


I happened to have some beautiful pink peppercorns for this recipe, straight from California. In the case that you don't, regular black peppercorns will be just fine. Don't let the type of vinegar stop you either- any mild white vinegar will do- white wine vinegar or rice vinegar for example. 


Peppercorn Pickled Ramps

Recipe inspired by Bon Appetit

Ingredients

1 cup ramp bulbs, greens saved for another use
1 tsp pink of black peppercorns
2 bay leaves
2 red chilis
1/4 cup white balsamic vinegar
1/2 cup water
2 tbs. raw sugar
3/4 tsp. salt

Directions

Clean ramps well and remove bulbs from greens. Dry and save the greens for another use- they are great in salads or pestos.

Place ramp bulbs, peppercorns, bay leaves and chilis in a pint size mason jar.

In a small pot, bring vinegar, water, sugar and salt to a boil. Pour over ramps to fill the jar. Cool, cover and store in fridge for weeks to months.

Wednesday, February 17, 2016

Florida Lime Pie


I have warm weather and sunshine on the brain- we leave for a quick trip to Captiva Island, off Florida's coast, on Saturday. To me, that means: citrus. Bright, zesty and fresh, citrus is like a shot of sunshine no matter what the weather is really like outside.


So this is an ode to the classic Key Lime Pie- with some serious upgrades. Soaked raw cashews and coconut milk lend the requisite creaminess, while sticking with whole foods. Maple syrup replaces the sugar, but could just as easily be raw honey.


The crust is a nutty mix of almonds and dates, minced up and packed down into individual cupcake cups. You can find these stiff cups, which are a bit taller than normal, in most specialty kitchen shops. I love them because they peel off and leave you with a stunning individual-sized dessert.


Ingredients

1/2 cup raw almonds (pecan or walnuts will also work)
1/2 cup soft medjool dates, pitted
¼ tsp. sea salt
1 cup raw cashew, soaked for 4-12 hours, drained
3/4 cup coconut milk
1/4 cup coconut oil
1/2 cup lime juice, about 3 large limes, reserving zest
1/2 cup maple syrup

Directions

Place almonds and dates in a food processor with sea salt and pulse until finely chopped. Test by pressing the dough lightly to see if it holds together. Press into the bottom of 10 stiff cupcake holders. Set aside.

Place drained cashews along with remaining ingredients (except lime zest) in a high power blender. Process until very smooth, scraping down as needed. Pour into cupcake holders over nut crust until full. Top with lime zest and freeze until firm. Remove from freezer 10-15 minutes before serving.

Relax. Eat Well.

Tuesday, December 29, 2015

Rosemary Pesto


On the first day that truly feels like winter, I have a little throwback to summer for you. 

Remember those herbs we talked about preserving at the end of the harvest this year? Dig those rosemary sprigs out of the freezer and let's get started. 

If starting with frozen sprigs, simply let them sit out at room temperature for 30 minutes or so, until they are easy to strip off the stem. 


Pesto can be the basis for so many wonderful dishes- I love to have a few different types in my freezer, ready to be pulled out for a quick dinner. Trying varying the herbs for some new twists.

Try this one instead of tomato sauce on a flatbread, with caramelized onions, fresh chèvre, and a sharp cheddar. Or tossed with some pappardelle noodles with blanched broccoli and toasted pine nuts. Or folded into a quick frittata with sun-dried tomatoes and mushrooms.

Rosemary Pesto

Ingredients

2 garlic cloves
1 cup packed rosemary leaves- from fresh or frozen
1 1/4 cup toasted walnuts
1/2 tsp. freshly ground pepper
1 1/2 tsp. sea salt
Zest of one lemon
2 tsp. lemon juice
1 cup extra-virgin olive oil

Directions

Peel garlic, and mince in food processor. Add rosemary through lemon juice and continue to puree, drizzling olive oil and scraping down as needed in to achieve desired consistency.

Store fresh in the refrigerator, or freeze in ice cube trays to be used later.

Relax. Eat Well.

Wednesday, September 9, 2015

Preserving the Herb Harvest


There are several ways I like to put up my herbs during the summer to be used during the winter months, when the snow covers the ground and there are no greens in sight. It not only saves money on pricey herb bunches, but it allows me to enjoy bright vibrant flavors and nutrition packed leaves when I need it most. 


Frozen as Pesto Cubes 
I make a huge batch of my favorite pesto, portion off into ice cube trays and place in the freezer. Once frozen solid, the cubes can be transferred into a freezer bag, labeled and stuck in the back of the freezer to be taken out and enjoyed in a variety of portion sizes. I use these on pizza, tossed with pasta or spread on wraps. You can use any herb, but my favorites are basil and rosemary.


Freezing the leaves whole
Can't be simpler than this. Simply harvest, wash, remove leaves and spread out on a baking sheet to freeze. Once frozen, transfer to a freezer bag and label, to be pulled out in small amounts without sticking together. The texture will be a bit off (not the best for fresh salads) but the flavor remains vibrant. I use my frozen leaves for sauces, smoothies salad dressings or anything baked or stir-fried, where texture is less important. I use this method with parsley, cilantro, sage, chives, lemongrass and mint. Even kale for that matter. Nothing better than Vitamin C rich summer parsley during the winter flu season!


Dried 
Simply harvest, wash, dry and bunch your herbs with a rubber band. Hang upside-down indoors or out for a few weeks until completely dry. To simplify storing, you can then remove the leaves and store in a airtight container (they'll fall off easier once dry). The stems are great for soup stock. I prefer this method for the oilier herbs, such as thyme, rosemary and sage, as they hold their original flavor better. I also like it with tulsi basil and mint for loose leaf tea. 


There you are! Hopefully this inspires you to take the time to preserve your garden herbs for the upcoming winter, or to grow a few more in your garden next year. There is no better way to eat locally, and promote health during the long winter months. 

Tuesday, May 5, 2015

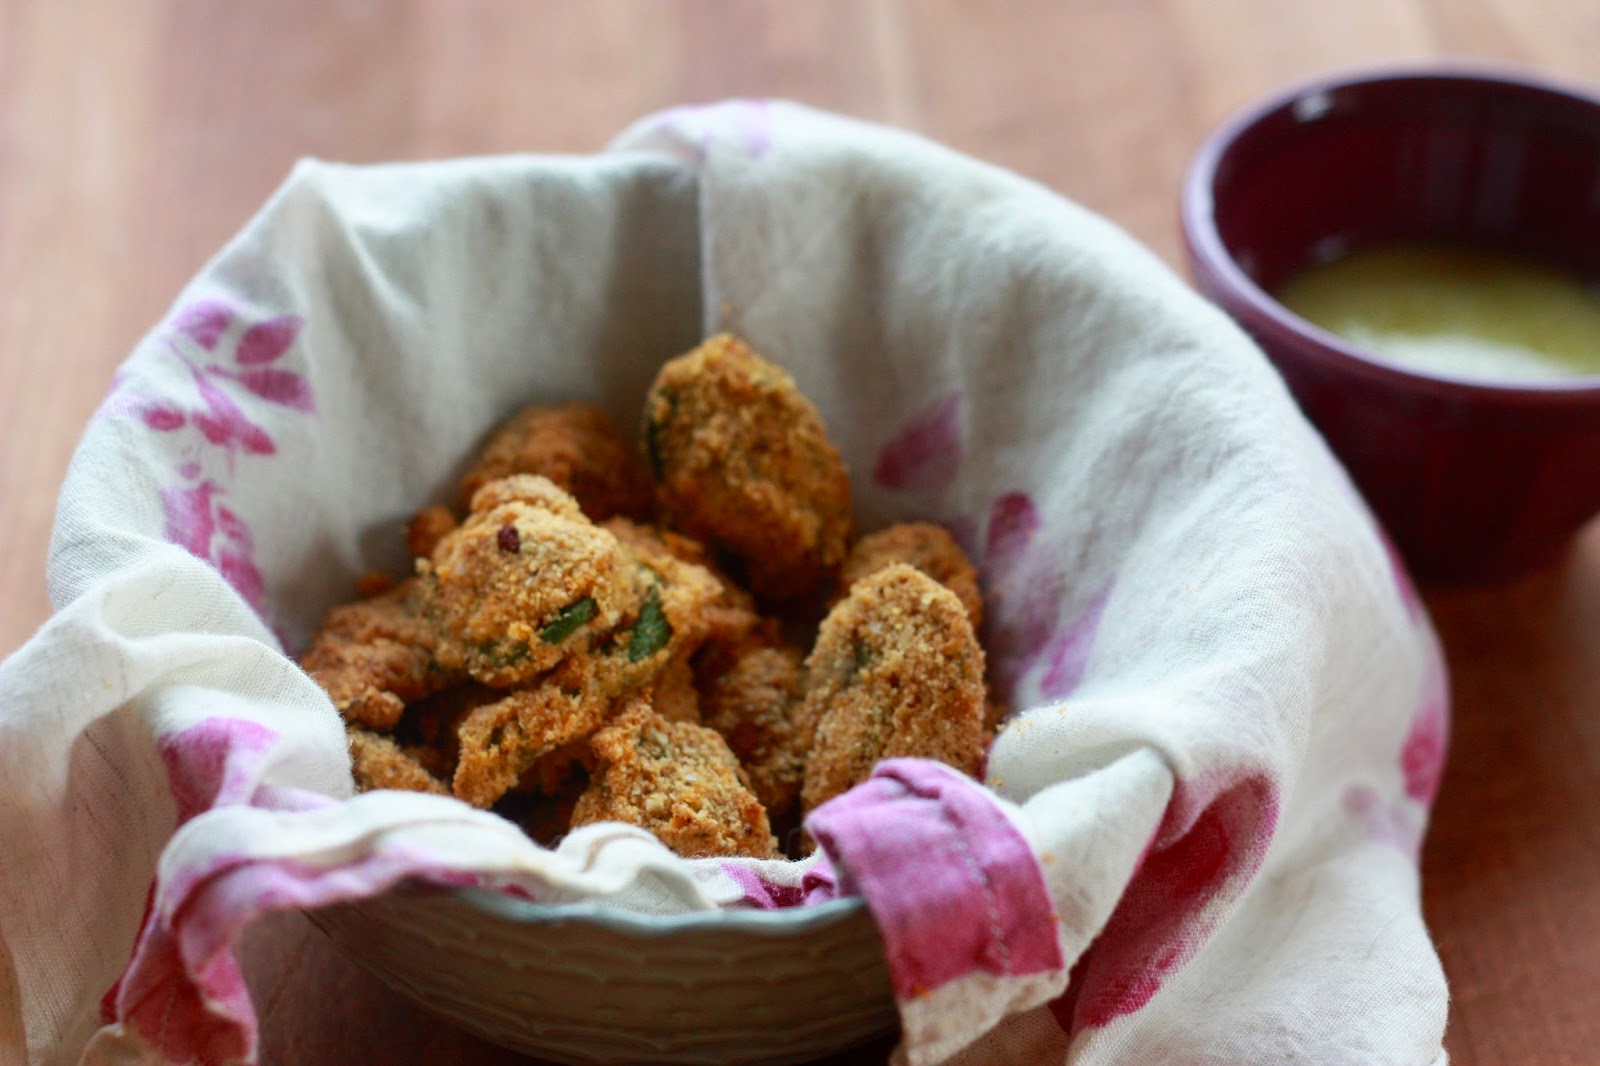
Crispy Fiddlehead Poppers


Woohoo!!! It's that time of year again. Wild ramps and fiddleheads are popping up- spring it is so sweet!


I absolutely love ramps, also known as wild leeks- the leaf is similar to a chive and the root bulb to a shallot. It is a member of the alium family, and offers hints of both onion and a mild garlic flavor.

In the past, I have posted recipes for Ramp Butter and Wild Dandelion Ramp Pesto. This year, I wanted to share a Fiddleheads recipe, which only seems overdue, given my name and love for the wild fern. 

Nutritionally speaking, these shoots are rich in Vitamin A and C, iron and manganese as well as omega-3 fatty acids.


It seems as though most recipes out there center on either pasta, garlicky sautés or pickling, so I wanted to share something a little different. This recipe is a bit addicting, and I can imagine it would go over well across the age groups. Not a bad way to get your ferns in. 


These poppers are super quick and easy, and pretty fool-proof. They reheat well- just pop them back on a sheet pan in a 350 degree oven for 5 minutes or so. You want to enjoy these babies hot. 

I enjoy them by themselves, but a dipping sauce does truly bring them over the top. Today I mixed equal parts plain whole milk yogurt with a lemon vinaigrette I had in the fridge, and that was delightfully rich yet tangy. I can imagine they would be great with any sort of aioli you could dream up, or my vegan raw almond "aioli" (with or without the cilantro, depending on your stance).

Crispy Fiddlehead Poppers
Serves 2

Note: if you do not have access to sumac, replace with garlic granules or powder.

Ingredients

2 cups fiddlehead ferns, washed well and trimmed

1/2 cup blanched almond flour
1/2 tsp sumac
1/4 tsp. smoked paprika
1/2- 3/4 tsp. sea salt (depending on your salt level preference)

1 large egg

1 tbs. oil for drizzling

Directions

Preheat oven to 400 degrees.

Clean and dry and fiddleheads well, trimming to a 1/2 inch below the furling head.

In a medium bowl, mix together almond flour, sumac (or garlic), smoked paprika and sea salt.

In a separate medium bowl, beat egg. Add in fiddleheads and toss well. Using a slotted spoon, remove fiddleheads from egg, letting excess drip off. Move in to almond flour mixture bowl and toss to coat very well.

Place breaded fiddleheads on a parchment paper lined baking sheet. Drizzle with oil. Bake for 10 minutes. Rotate pan and continue to bake for another 5 minutes. Remove pan, flip fiddleheads and return to oven for the final 5 minutes.

Serve immediately with your favorite dipping sauce.

Relax. Eat Well. 


Saturday, April 18, 2015

Fresh Orange Sorbet in Citrus Shells


What a perfect melding of winter and spring- a transition dish, with the flavors of the season we are leaving behind, and the textures and sensations of the one that is to come.


I have never made sorbet before, and haven't had an ice cream maker since childhood. This recipe does not require any fancy equipment- just a food processor or blender, and some muscle (for all that juicing). So simple, yet so sweet.


I happen to have a mix of oranges and tangelos in my fridge, so I used two of each. Feel free to take liberty with the citrus you choose- next time I am going to try adding in some shaved ginger and maybe even a touch of fresh mint to bring some additional excitement to the tongue. I would just add this in when making the simple syrup, and strain afterwords. I'd also love to replace some or all of the sugar with honey- but that is for another day. 


This step is completely optional- but I think it is so fun to use the citrus half shells as the serving container- just juice each half completely, and use a spoon to scrape out the remaining pith. Give it a good wash and dry, and then stick them in the freezer with the sorbet to be used when ready.

Fresh Orange Sorbet in Citrus Shells
Serves 4-6

Ingredients

4 oranges (or your favorite citrus)
1 lemon
1/3 cup water
1/2 cup cane sugar

Directions

Wash citrus well and cut in half along the middle. Juice completely- you should end up with about 1.5 cups of juice.

To make a simple syrup, add water and sugar to a small pot. Bring to a simmer over low-medium heat, and cook for 2 minutes. Remove from heat, pour into a bowl and chill in freezer for 10 minutes.

If planning to serve the sorbet in the citrus shells, take a spoon and scrape each half clean, removing any remaining pith, while being careful not to break through. Dry and place in the freezer.

Once chilled, combine simple syrup with citrus juice in a medium bowl. Freeze for 2-4 hours, stirring occasionally. Once frozen, scoop into a food processor or blender and blend until smooth.

Can serve immediately, or store in an airtight container in the freezer for a few days. When serving, scoop sorbet into a frozen citrus half and enjoy!


Relax. Eat Well.

Tuesday, March 24, 2015

Thai Almond Noodles


This has been a staple dish in my kitchen for quite awhile now. I've given out the recipe enough times that I figured it deserves a space on the blog. 

I'm not a huge Italian pasta fan personally, but I can get down with some Asian noodle preparations.  This one features almond butter as the thickening ingredient for the sauce, along with a nice dose of spicy ginger, garlic and galangal. 


For those of you unfamiliar with galangal, it is a Thai root, with a pungent and spicy flavor profile. I'll admit, it is not super common to most kitchens, but it is worth seeking out. For Vermonters, I find my fresh galangal in the produce section of City Market in Burlington. It is not always in stock, but when it is, I buy a very large chunk or two and store them in the freezer for later use. When you are ready to use it, let it sit out for a few minutes and use a microplane to shave some off. If you are stuck without, just omit it in this recipe and amp up the ginger, or maybe throw in a stalk of lemongrass or two. 


Using vegetables cut into "noodle" shapes helps bulk up this dish without relying too heavily on the starchy pasta, while boosting the nutrition. I used the julienne blade on my OXO mandoline, but you can also use a spiralizer or one of these great hand-held julienne peelers- they do the job well.


To amp up the protein, I added Oven-Fried Turmeric Tofu, which pairs really well with this dish, and just adds to the rainbow effect. Optional, but nice. 


Thai Almond Noodles

Serves 8

Ingredients

12 oz. pasta- regular or gluten-free (I used fettuccine)
1 small yam, julienned
1 cucumber, julienned
1 red pepper, thinly sliced into long strips
1 scallion, thinly sliced
1/2 cup roasted and salted almonds or peanuts
Optional: Turmeric Tofu

Sauce:
1/3 cup fresh lime juice or brown rice vinegar
1 1/2 tablespoons fresh ginger
3 tablespoons tamari
4 tablespoons almond butter
1 1/2 tablespoons honey
1/4 teaspoon chili flakes
3 garlic cloves, minced
1 tsp. fresh galangal (optional)

Directions

Place a medium pot of water over high heat and bring to a boil. Prep yams by julienning into long strips. When boiling, add pasta and set timer for recommended cook time, minus 5 minutes. When timer sounds, add julienned yam and cook for an additional 5 minutes. Remove from heat and drain, rinsing with cold water.

Add drained noodles/yam to a large bowl, along with julienned cucumber and sliced red pepper.

To make the sauce, place all sauce ingredients (lime/vinegar through galangal) in high-powered blender and blend until smooth.

Add sauce to noodle bowl and toss to coat. Place in serving dish and top with sliced scallions and roasted peanuts/almonds. If feeling ambitious, serve with Turmeric Tofu.

Relax. Eat Well.