Showing posts with label sauce. Show all posts

Wednesday, September 5, 2018

Quinoa "Fried Rice"


I make this dish so often I thought I'd share, just in case you'd like to add it to your weeknight repertoire. It comes together quickly, especially if you prep the sesame ginger sauce in advance. I like to make a double batch of the sauce to store in the fridge, as it keeps for several weeks.
It's the perfect dish for someone who is quinoa-curious, but maybe a little intimidated as well. See? There's nothing to be scared of.
You can vary the vegetables- I'll often use green beans in place of broccoli or throw in some chopped garlic scapes when they are in season. You can finish it with your favorite hot sauce, chopped cilantro or salty peanuts for a crunch.

You're now two pans and 30 minutes away from a dinner chocked full of high quality protein, fiber and stir-fried veggies. 
Quinoa Fried “Rice”
Serves 2 as a main dish
Ingredients
3 tbs. tahini
3 tbs. tamari soy sauce
2 tbs. honey or syrup
1 tbs. toasted sesame oil
2 garlic cloves
1-inch ginger root

½ cup quinoa
1 cup water or stock
2 tbs. oil of choice, divided
Small head of broccoli, about 1 cup chopped
1 small carrot,  grated
2 eggs 
2 tbs. sesame seeds
Chili flakes, if desired 
Directions
Place quinoa and water/stock in a small pot. Bring to a boil and turn down to a simmer. Cook for 15-20 minutes, covered, or until all liquid is absorbed. Remove lid, fluff and set aside.
To make the sesame ginger sauce, combine tahini through ginger in a blender and process until smooth. Set aside.
Beat eggs in a small bowl. Season with a dash of salt and pepper.  
Heat 1 tbs. oil over medium heat in a large pan. Add eggs and scramble quickly. Remove to a small bowl and break up into small pieces. Wipe pan clean. Add remaining tbs. of oil to the pan along with carrots and broccoli and stir-fry until bright and tender, about 5 minutes. Add cooked quinoa, scrambled eggs, 4-6 tbs. sesame ginger sauce and sesame seeds and continue to stir-fry for 3 minutes.  Taste and adjust seasoning with salt and chili flakes if desired.

Sunday, April 10, 2016

Pumpkin Mac and Cheese with Toasted Breadcrumbs


This is pure comfort food. Since it is April and still feels like winter, I'm allowing it. 

Finding a love for whole foods can be a journey, which sometimes takes years to develop and cement. It's a transition, and like any other transition, baby steps are often necessary. This is a great recipe for a transitional kitchen, one that helps convince skeptics that whole foods and healthier ingredients can still be delicious and satisfying. And so the momentum builds. And bellies are warmed.

For the deepest flavor, I highly recommend roasting a pumpkin (or any winter squash) and scooping out the inside to be used in this recipe. If you are short on time or energy, canned pumpkin puree can be used, and will still be delicious (just not as delicious!). So no excuses.

This recipe can be made vegan by simply omitting the cheddar cheese. Or you can swing the other way and increase the dairy by using cow's milk in place of soy milk. Either way, I promise you'll love it. 

You can even make a double batch, and freeze the second one in lunch size portions. One of our secrets to weekday success is having a stocked freezer from past meals. I chill the second one, cut it into desired portions, place those on a parchment paper lined baking sheet to freeze, and then move each one into a labeled quart sized freezer bag. 

Pumpkin Mac and Cheese with Toasted Breadcrumbs
Serves 4-6

Ingredients

3 Tbs. olive oil
1 medium onion, diced
1/4 cup whole wheat flour
2 1/2 cups soy milk
1 cup pumpkin puree
1 cup sharp cheddar cheese, shredded
1/2 tsp. salt 
pinch of nutmeg
1/4 tsp. freshly ground black pepper
a dash of turmeric, optional
Additional salt and pepper, as needed

1/2 lb. whole wheat pasta shells, cooked
1/2 cup breadcrumbs

2 tbs. sage leaves, sliced thinly

Directions

Cook shells al dente, according to package directions. Drain and set aside.

Preheat oven to 350 degrees.

Heat olive oil over low-medium heat in a medium pot. Add diced onions and cook until translucent. Sprinkle in flour and stir constantly for one minute, to toast slightly. Slowly pour in soy milk, a half cup or so at a time, stirring with a whisk to prevent clumping. Once incorporated, add pumpkin and continue to cook for 15-20 minutes, stirring often, or until thickened. Add shredded cheese, salt, nutmeg, black pepper and dash of turmeric. Taste and season with additional salt if needed (don't under-salt!)

Mix pumpkin cheese sauce with cooked pasta shells and pour into a oiled baking pan. Top with breadcrumbs. Bake in 350 degree oven for 25 minutes, or until sides are bubbling and breadcrumbs are toasty. Serve garnished with sage. 

Relax. Eat Well.


Tuesday, December 29, 2015

Rosemary Pesto


On the first day that truly feels like winter, I have a little throwback to summer for you. 

Remember those herbs we talked about preserving at the end of the harvest this year? Dig those rosemary sprigs out of the freezer and let's get started. 

If starting with frozen sprigs, simply let them sit out at room temperature for 30 minutes or so, until they are easy to strip off the stem. 


Pesto can be the basis for so many wonderful dishes- I love to have a few different types in my freezer, ready to be pulled out for a quick dinner. Trying varying the herbs for some new twists.

Try this one instead of tomato sauce on a flatbread, with caramelized onions, fresh chèvre, and a sharp cheddar. Or tossed with some pappardelle noodles with blanched broccoli and toasted pine nuts. Or folded into a quick frittata with sun-dried tomatoes and mushrooms.

Rosemary Pesto

Ingredients

2 garlic cloves
1 cup packed rosemary leaves- from fresh or frozen
1 1/4 cup toasted walnuts
1/2 tsp. freshly ground pepper
1 1/2 tsp. sea salt
Zest of one lemon
2 tsp. lemon juice
1 cup extra-virgin olive oil

Directions

Peel garlic, and mince in food processor. Add rosemary through lemon juice and continue to puree, drizzling olive oil and scraping down as needed in to achieve desired consistency.

Store fresh in the refrigerator, or freeze in ice cube trays to be used later.

Relax. Eat Well.

Tuesday, May 5, 2015

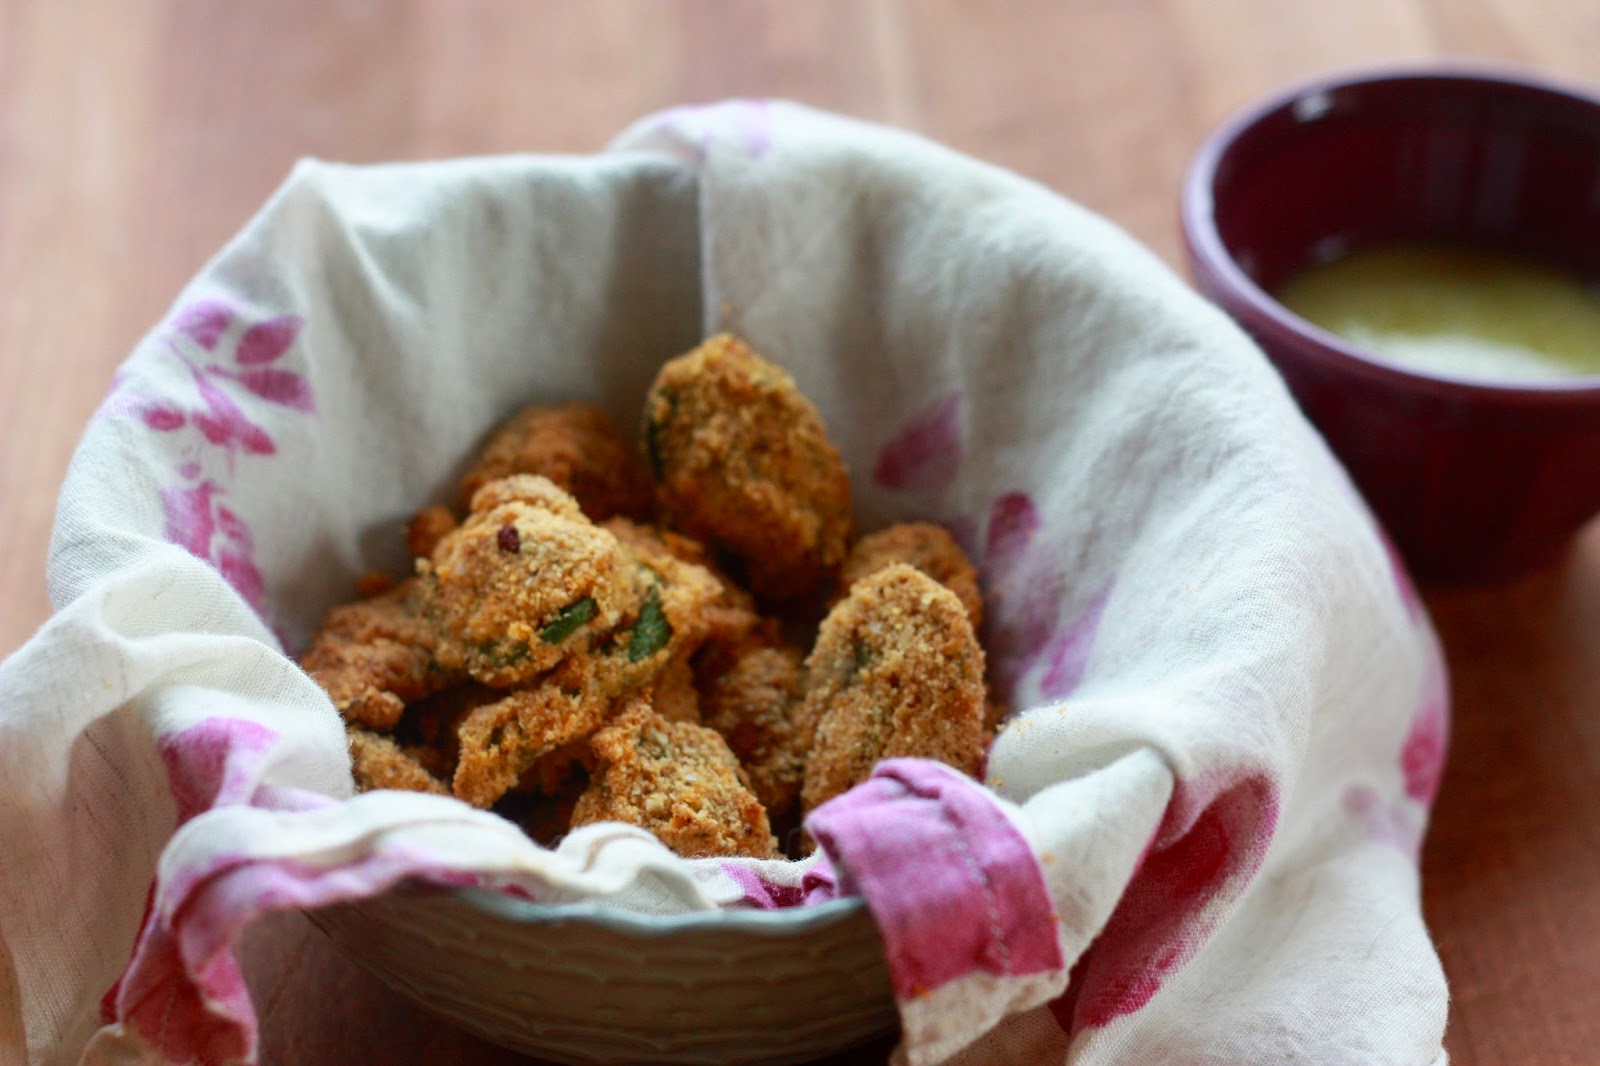
Crispy Fiddlehead Poppers


Woohoo!!! It's that time of year again. Wild ramps and fiddleheads are popping up- spring it is so sweet!


I absolutely love ramps, also known as wild leeks- the leaf is similar to a chive and the root bulb to a shallot. It is a member of the alium family, and offers hints of both onion and a mild garlic flavor.

In the past, I have posted recipes for Ramp Butter and Wild Dandelion Ramp Pesto. This year, I wanted to share a Fiddleheads recipe, which only seems overdue, given my name and love for the wild fern. 

Nutritionally speaking, these shoots are rich in Vitamin A and C, iron and manganese as well as omega-3 fatty acids.


It seems as though most recipes out there center on either pasta, garlicky sautés or pickling, so I wanted to share something a little different. This recipe is a bit addicting, and I can imagine it would go over well across the age groups. Not a bad way to get your ferns in. 


These poppers are super quick and easy, and pretty fool-proof. They reheat well- just pop them back on a sheet pan in a 350 degree oven for 5 minutes or so. You want to enjoy these babies hot. 

I enjoy them by themselves, but a dipping sauce does truly bring them over the top. Today I mixed equal parts plain whole milk yogurt with a lemon vinaigrette I had in the fridge, and that was delightfully rich yet tangy. I can imagine they would be great with any sort of aioli you could dream up, or my vegan raw almond "aioli" (with or without the cilantro, depending on your stance).

Crispy Fiddlehead Poppers
Serves 2

Note: if you do not have access to sumac, replace with garlic granules or powder.

Ingredients

2 cups fiddlehead ferns, washed well and trimmed

1/2 cup blanched almond flour
1/2 tsp sumac
1/4 tsp. smoked paprika
1/2- 3/4 tsp. sea salt (depending on your salt level preference)

1 large egg

1 tbs. oil for drizzling

Directions

Preheat oven to 400 degrees.

Clean and dry and fiddleheads well, trimming to a 1/2 inch below the furling head.

In a medium bowl, mix together almond flour, sumac (or garlic), smoked paprika and sea salt.

In a separate medium bowl, beat egg. Add in fiddleheads and toss well. Using a slotted spoon, remove fiddleheads from egg, letting excess drip off. Move in to almond flour mixture bowl and toss to coat very well.

Place breaded fiddleheads on a parchment paper lined baking sheet. Drizzle with oil. Bake for 10 minutes. Rotate pan and continue to bake for another 5 minutes. Remove pan, flip fiddleheads and return to oven for the final 5 minutes.

Serve immediately with your favorite dipping sauce.

Relax. Eat Well. 


Tuesday, March 24, 2015

Thai Almond Noodles


This has been a staple dish in my kitchen for quite awhile now. I've given out the recipe enough times that I figured it deserves a space on the blog. 

I'm not a huge Italian pasta fan personally, but I can get down with some Asian noodle preparations.  This one features almond butter as the thickening ingredient for the sauce, along with a nice dose of spicy ginger, garlic and galangal. 


For those of you unfamiliar with galangal, it is a Thai root, with a pungent and spicy flavor profile. I'll admit, it is not super common to most kitchens, but it is worth seeking out. For Vermonters, I find my fresh galangal in the produce section of City Market in Burlington. It is not always in stock, but when it is, I buy a very large chunk or two and store them in the freezer for later use. When you are ready to use it, let it sit out for a few minutes and use a microplane to shave some off. If you are stuck without, just omit it in this recipe and amp up the ginger, or maybe throw in a stalk of lemongrass or two. 


Using vegetables cut into "noodle" shapes helps bulk up this dish without relying too heavily on the starchy pasta, while boosting the nutrition. I used the julienne blade on my OXO mandoline, but you can also use a spiralizer or one of these great hand-held julienne peelers- they do the job well.


To amp up the protein, I added Oven-Fried Turmeric Tofu, which pairs really well with this dish, and just adds to the rainbow effect. Optional, but nice. 


Thai Almond Noodles

Serves 8

Ingredients

12 oz. pasta- regular or gluten-free (I used fettuccine)
1 small yam, julienned
1 cucumber, julienned
1 red pepper, thinly sliced into long strips
1 scallion, thinly sliced
1/2 cup roasted and salted almonds or peanuts
Optional: Turmeric Tofu

Sauce:
1/3 cup fresh lime juice or brown rice vinegar
1 1/2 tablespoons fresh ginger
3 tablespoons tamari
4 tablespoons almond butter
1 1/2 tablespoons honey
1/4 teaspoon chili flakes
3 garlic cloves, minced
1 tsp. fresh galangal (optional)

Directions

Place a medium pot of water over high heat and bring to a boil. Prep yams by julienning into long strips. When boiling, add pasta and set timer for recommended cook time, minus 5 minutes. When timer sounds, add julienned yam and cook for an additional 5 minutes. Remove from heat and drain, rinsing with cold water.

Add drained noodles/yam to a large bowl, along with julienned cucumber and sliced red pepper.

To make the sauce, place all sauce ingredients (lime/vinegar through galangal) in high-powered blender and blend until smooth.

Add sauce to noodle bowl and toss to coat. Place in serving dish and top with sliced scallions and roasted peanuts/almonds. If feeling ambitious, serve with Turmeric Tofu.

Relax. Eat Well.

Friday, February 21, 2014

Jamaican Jerk Tempeh


Inspired by our trip to the tropics of Panama earlier this month, I prepared this Jamaican Jerk Tempeh for the CSK last week. I received so many notes of enthusiasm that I decided it deserved a blog post of it's own so it could be shared with our cyber world friends. 


I'll be the first to admit, tempeh is not the easiest ingredient to make exciting. In fact, it always requires a bit of finesse. I love it for many reasons- it's hearty, nutty flavor, nutritional profile and protein prowess, but it can often end up dried-out and less than appetizing. For that reason, I have a few rules when cooking tempeh. I don't dry grill it. No matter how nice your spice rub is, tempeh needs ample liquid to come to life. 

I prefer to cook tempeh in a liquid marinade, either in a skillet or in the oven. Once it has absorbed the flavors and hydration, then it is possible to get some dry heat going to give the edges a bit of a char- either on the grill, broiler or convection oven. 


I aim for marinades with loads of flavor- this jamaican jerk sauce is a perfect example. If the sauce itself doesn't have a significant sweet component, I end the cooking process with a drizzle of honey or maple syrup and a touch of oil to achieve the golden caramelization that really brings tempeh into the winners circle.


Of course I have to leave you with a tiny nutrition lesson before I can move on. Tempeh is a fermented soybean product, originating from Indonesia. It uses whole, unrefined edamame which is fermented and pressed to produce a firm patty. Rich in high-quality amino-acids and friendly bacteria, tempeh is a nutritious vegetarian protein source. I buy Rhapsody Tempeh, which is produced in Cabot, Vermont using organic soybeans grown in Quebec. As with all soybean products, I recommend doing some research on your brand and buying organic to avoid GMO-laden soy.

Try serving this with a side of smashed yams and a tender green salad tossed with sesame dressing. The perfect lunch or light dinner. 


Jamaican Jerk Tempeh
Serves 4 as main component
Ingredients
1/2 cup fresh orange juice
1/4 cup rice vinegar

2 tbs. olive oil

2 tbs. tamari soy sauce

1 tbs. Worcestershire sauce (use vegetarian version if vegetarian)
1 tbs. brown sugar

2 tsp. allspice

1/2 tsp. sea salt

1 tsp. cinnamon
1/4 tsp. nutmeg
1 tbs. fresh minced ginger

2 cloves garlic, minced

1/2 tsp. chili flakes, or to taste (optional)
4 chopped scallions
8 oz tempeh, sliced thickness in half and then into 8 triangles
Cilantro, chopped, for garnish
Instructions
In a medium bowl, combine all the marinade ingredients and stir well (if you aren’t into mincing, you can alternatively add everything to a blender and process until smooth). Add the tempeh triangles and ensure all of the tempeh is coated. Let rest for 30-45 minutes.

Preheat oven to 375 degrees.


Line a 9x13 baking pan with parchment paper, trying to insure that the paper curves up the sides and ends a few inches, for easy clean-up. Place tempeh in a single layer, sprinkle with scallions and pour remaining marinade on top. Bake for 30 minutes, or until most of the marinade has absorbed and bottoms are beginning to brown. Garnish with cilantro to serve.

Relax. Eat Well.