Monday, May 2, 2011

Buckwheat Cheese Sticks


I have been a busy busy bee in the kitchen lately. A lot of firsts this week: first big catering gig out of the new kitchen and first CSK day today! Tonight was Thai, and for those of you who received a meal, I hope you enjoyed it! It felt great to have it all come together for the first time (although I think I need to go pass out now).

Luckily I had a few helper bees home today to form a last minute spring roll-ing assembly line because I definitely underestimated how long it takes to roll 45 of em. Eeks! But they are just so delicious, I had to pamper my first-time customers... so it was all worth it.


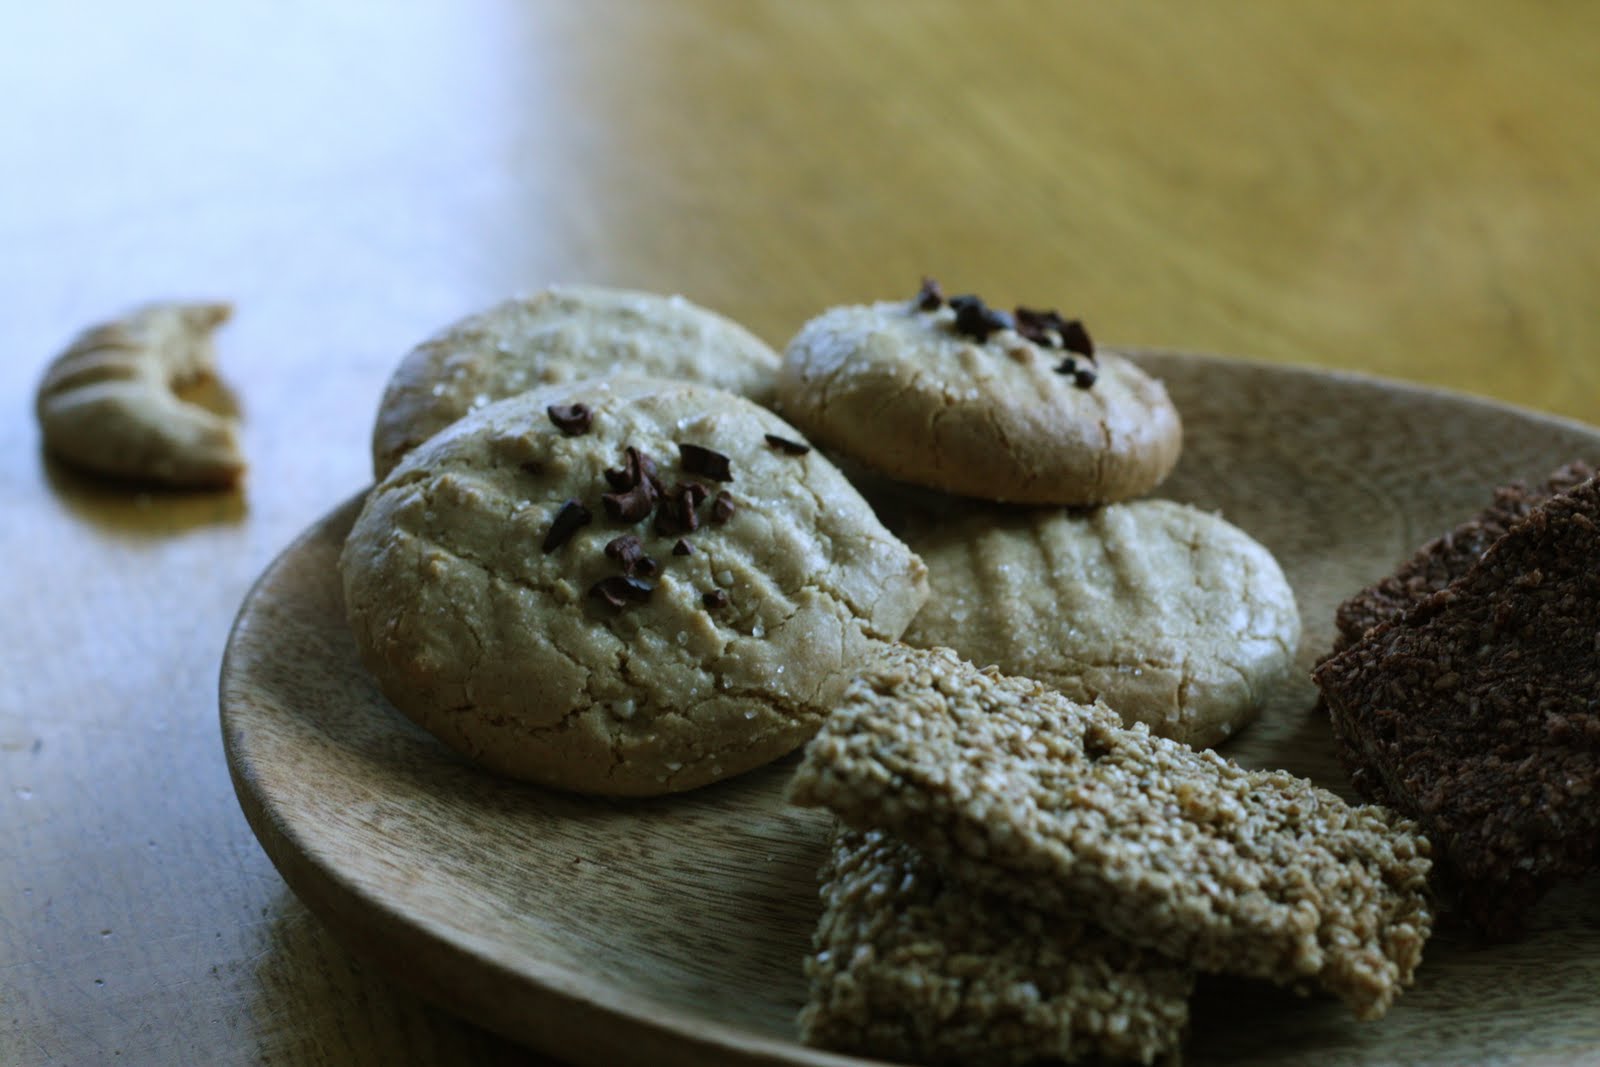
In other news, I served these buckwheat cheddar straws at a 75th birthday party on Saturday, to a wonderful couple in Stowe and their extremely gracious friends. It was part of a cheese platter adorned with fresh fruit, turkish figs, maple tamari nuts and 6 extravagant wedges of cheese. A nice way to start or end a meal if you ask me.


The recipe started from Heidi Swanson's 101cookbooks.com, but morphed into a gluten-free version with rosemary instead of thyme. I did try it her way (with WW pastry flour) and decided I liked the gluten-free version better, as it has a complex grainy flavor that added to the rustic appeal. My next project will be to try a dairy-free version, with olive oil instead of butter... let me know if anyone tries it first!

These cheese sticks keep well for several days in an airtight container, and the dough can be made the day before they bake, if you are planning ahead. Just keep them in the fridge instead of freezer.


Buckwheat Cheese Sticks
Makes about 30

Ingredients
1/2 cup buckwheat flour
1/2 cup brown rice flour 
1/2 cup Teff flour
1 teaspoon fine grain sea salt
1 teaspoon fresh rosemary, chopped
8 tablespoons (4 ounces) unsalted butter, cold, cut into 1/4-inch cubes
3/4 cup cheddar, grated
1/2 cup ice cold water


Directions
In a food processor combine the flours, salt, rosemary and butter and pulse until you have a sandy texture. Add grated cheddar and pulse several more times. With blade running, add the ice water gradually until your dough comes together to form a ball. Remove dough from food processor, form into two flattened balls, place in an airtight container and place in the freezer for one hour. 


Preheat the oven to 400 degrees


Working with one ball at a time, remove dough from freezer and roll out on a floured surface, using a rolling pin, to about 1/4 inch thick. Slice into long strips about 1/2 inch thick using a sharp knife. Remove a strip and working the entire length of the dough, gently pinch the sides in. This will make it easier to roll as you create your round stick. Gently roll dough to about 1/4 thick, cut in half if ridiculously long, and place on a parchment paper lined baking sheet. Repeat with remaining strips, and second ball of dough. Give each stick enough wiggle room so that it won't attach itself to its neighbor. 


Bake for 8 minutes, flip, and continue baking for an additional two, or until golden brown. Cool, and enjoy!


Relax. Eat Well.


Friday, April 15, 2011

Cashew Butter Cookies


I feel like I have A MILLION things to do right now, but I am making myself sit down with a glass of wine (it is Friday, right?) and share this wonderful recipe with all you eager foodies. After all, that is why I am in the business to begin with: to share, create, be inspired and celebrate all that is GOOD FOOD. And this is good food.


The idea is simple: a play on the all-time favorite peanut butter cookie, with a slight twist. Instead of jarred peanut butter which is 1.) a high allergen food and 2.) ground nuts that have then been exposed to oxygen at room temperature for who knows how long, we are dealing with freshly ground raw cashew here, baby. Nuts are chock full of (delicious) volatile oils, which go rancid quickly when ground (exposed to oxygen), toasted (exposed to heat) and left at ambient temperatures for too long. The best way to embrace the (delicious) nutrition inside that nutty package is to buy them raw, store them in your freezer, and grind them just before consuming. 

So anyway, as I am having deja vu as I type, I am sure you have heard it all before :) The short and long, this is a (delicious) new version that you just have to try! A number of flours can be used, but I like whole grain spelt flour if you can tolerate a bit of gluten, as it has a great texture, yet still offers some diversity to the diet. I have also made them with brown rice flour, to the delight of a different crowd. Have fun, enjoy, and don't forget the forked criss-crosses!

Cashew Butter Cookies
Makes 15 cookies
Ingredients
1 cup spelt flour
½ teaspoon baking soda

½ teaspoon fine grain sea salt

½ cup cashews
½  cup honey, agave, maple syrup,
 or a mixture
3 tbs. extra virgin olive oil

1 teaspoon vanilla extract
Cane sugar, for garnishing
Directions
Preheat oven to 350F degrees.
In a large food processor, grind the cashews to a smooth butter. 
In a medium mixing bowl combine the flour, baking soda, and salt. In a separate larger bowl combine the cashew butter, sweetener of choice, olive oil, and vanilla and stir until combined. Pour the flour mixture over the cashew butter mixture and stir. Let sit for five minutes, give another quick stir.

Roll a tablespoon of the dough into balls and place on baking sheet lined with parchment paper. Using a fork dipped in water, flatten each cookie with a criss-cross pattern. Sprinkle with cane sugar to garnish. Bake for 10- 11 minutes, making sure not to over bake them as they will dry out. Let cool and harden slightly before enjoying.

Last time, I served them in a platter with Sesame Kelp Bars and Living Fudge.


Relax. Eat Well.

Saturday, April 2, 2011

My Certified Natural Kitchen!

Hi all!


Just wanted to make a quick announcement that my kitchen in Moretown has now been officially certified through the Department of Health! Although this may not sound all that exciting on it's own, it does mean that I will now be able to schedule natural cooking classes and begin a prepared meal service in my own space.


The prepared meal service will begin in May and be modeled after a CSA. Members will subscribe, commit to one meal per week and pay up front on a monthly basis. In turn they will be able to use reusable glass containers and recieve delicious and convenient meals packed with nourishing ingredients from our neighborhood farmers. I am so excited that our community truly understands the importance of supporting a sustainable food system, and I CANNOT wait to become part of it! For more information and to sign up for future communication about this exciting new venture, please visit https://spreadsheets.google.com/viewform?formkey=dEpHUG1wMXk5YjQ5MDlFSVN2ZktIT3c6MQ and enter your contact information.


I will also begin to schedule healthy cooking classes that teach the skills you need to know to create a natural kitchen in your own home. If you have enjoyed the recipes from this blog, you will love these classes. With varying themes every month, from ethnic foods, to spring cleansing, to healthy sweets, there will always be something new to learn. If you have ideas or class suggestions, please post them below!


Ok so anyway, enough about me. I have been making this recipe all week (three days in a row) from my favorite blog, 101cookbooks, and have to share it! Since Heidi already did such a wonderful job posting the recipe, I'll simply give you the link and send you off with a few words. Take it to California. Diced avocado, juicy tomato, a dallop of sour cream spiked with lime zest, a sprinkling of cheese and you are in heaven. Love these five minute meals.


Relax. Eat Well.

Thursday, March 24, 2011

Cherry Pecan Granola


Dark colors and flavors rock this granola into a breakfast revolution. Not very sweet, generously toasted and deeply nutty, it transforms any old bowl of yogurt into a spa retreat. It makes me want to hug the bowl the way you do a cozy bowl of steaming soup.


Granola is expensive to buy, yet reasonably cheap and easy to make. Anyway, who wants the sugar and oil packed versions you find in your typical bulk bin, at 200 calories per 1/2 cup? Ridiculous. This version is sweetened naturally with apple juice and a touch of maple syrup (look, it's Vermont, alright?) and contains no oil to speak of. I've made it before with apple juice I made fresh, and then the maple syrup was totally unnecessary. This time I was short on time and had some Santa Cruz Organic's apple juice leftover in the fridge, and found that it appreciated a few tablespoons of syrupy sweetness. But to each his own, and you can certainly personalize that aspect based on your preferences.

I like to keep my granola in the freezer so that the freshly toasted nuts stay fresh, as they are subject to rancidity once exposed to heat. Minimizing heat and exposure to oxygen and light helps prevent this from happening. General rule of thumb: buy your nuts and seeds raw, store them in the freezer and toast them yourself to capitalize on the bounty of nutrition they offer. Once toasted, consume them fairly quickly and keep them in the freezer if you will be storing them for more than a few days.

Anywho, this recipe is totally flexible and you can use any combination of nuts, seeds and dried fruit. Some are more expensive than others, so keep that in mind when making your grocery list. My version is probably one of the pricier combinations possible, but you could really keep your costs down by creating a raisin and almond version, I would imagine. I like to throw some pumpkin seeds in there as well when I have them, as they are high in magnesium and protect against prostate cancer and promote heart health.

Cherry Pecan Granola
Makes about 6 cups

Ingredients
4 cups rolled oats
1/4 cup flax seeds ( I use golden)
1 cup apple juice
1 cinnamon stick
1/2 tsp. ground ginger
1/2 tsp. salt
2-4 tbs. maple syrup
1 tsp. vanilla
1 cup raw pecans
1/2 cup dried cherries, chopped

Directions
Preheat oven to 325 degrees

In a large bowl, combine oats and flax seed. In a small saucepan, heat the apple juice, cinnamon and ginger over medium heat until it reduces by half. Remove the cinnamon stick and add salt, 2 tbs. maple syrup and vanilla. Pour juice mixture over oat mixture and toss to combine. Taste and add more syrup, ground cinnamon or ginger to taste.


Spread contents of bowl on 2 baking sheets evenly. Bake for 20 minutes. Remove from oven, add pecans, stir and continue to cook for an additional 10-20 minutes, or until toasty and beginning to brown, stirring occasionally. Remove from heat, let cool and toss with dried cherries.


Serve over a generous bowl of plain yogurt drizzled with honey and topped with fresh fruit and chopped dates. Inhale, and smile.


Relax. Eat Well.

Sunday, March 20, 2011

A Miso Soup of sorts


I have now been feeling sickly for nine days. 9. More than a week. It's driving me crazy.

In fact, bonkers, might be a better term (remember that cartoon?). The thing is, I am never sick. And when I am, it takes my body about a day or two to bounce back. So I am not sure what is going on, but I'm not happy about it.

However, it does give me a chance to really step back and consciously choose my diet to support my immune system. The key to immune support starts with optimizing digestion, as the majority of our immune system lives in our gut, ready to ward off an invaders that try to come in. So chewing thoroughly, avoiding high-allergen foods (gluten, dairy, peanuts etc.), and listening to your body are all super important. And then there are all the immune-boosters that lie out there in the natural food world: mushrooms (shitakes, maitakes, reishis), miso, citrus fruits and sea vegetables.

I have been making lots of fresh juices out of oranges, lemons and pineapple (I juice the cores), with some cilantro for detoxifying and kale for it's chlorophyll. I have also been enjoying big bowls of miso soup, as it seems to naturally incorporate so many of the immune boosters my body needs right now. I like it with a cup or so of rice for a more substantial meal, or simplified down to plain miso broth as a sipper to get me through the day.

This is the recipe I made last night with the fresh maitakes I found at City Market yesterday as well as a few tablespoons of red curry paste I had lingering in the fridge since spring rolls a few weeks back. It was perfect (maybe the highlight of my day?) so I thought I would share it with you. The curry paste deserves a blog of it's own, which will happen someday, but I'll include the recipe below for now. This is definitely worlds above what you can buy at the store, but you could always substitute Thai Kitchen's version if you had to. Or if you don't have any in the fridge, you can always go ahead and leave it out for a more traditional version.


A Thai-inspired Miso Soup
Serves 2

Ingredients


4 cups vegetable broth (homemade if you can!)
1 strip wakame or kelp, sliced or torn into small pieces
2 oz. fresh maitake or shitake mushroom (or 4 rehydrated dried shitakes), sliced
1/4 cup of tofu, in small cubes
2 tbs. sweet white miso
2 tbs. red miso
2 tbs. red thai curry paste, see below (optional)
1 tbs. shoyu or tamari
a handful of spinach

Directions

Heat vegetable broth, seaweed, mushrooms and tofu in a medium saucepan to a simmer. Remove from heat. Take a cup or so of hot liquid and place in a bowl with miso. Stir until miso dissolves completely. Add miso mixture back into the saucepan with the remaining ingredients, stirring to combine. Cover until spinach wilts. Enjoy immediately!


Thai Curry Paste

Ingredients

1/4 cup chili de arbol
1 tsp coriander seeds
1/4 tsp cumin seed
1/8 tsp black peppercorns
1/2 stalk lemongrass, trimmed and finely minced
1 tsp minced cilantro stem
1 Tbs peeled and minced ginger
1/4 tsp lime zest
1 Tbs minced garlic
1 Tbs minced shallot
1/8 tsp course salt

Directions

Break the stems off the chilies and discard them along with the seeds. Break the chilies into pieces, place in a bowl with just enough warm water to cover. Let soak for 20 to 30 minutes. When done soaking, remove from water (reserve water) and finely chop.

Meanwhile, heat a small heavy skillet over medium-high heat. Add the coriander seeds and dry roast, frequently shaking the pan or stirring until they release their smell and begin to change color, about 3 minutes. Transfer coriander to a bowl to cool and then repeat process with the cumin seeds, toasting for about 1 minute, and adding them to the coriander. Repeat again with the peppercorns, roasting long enough to heat them well - about 1 minute.

Grind the toasted spices in a coffee grinder and  place in a small bowl. Mince wet ingredients (lemongrass through shallot) very finely (this can be done in a small food processor) and add to spices along with the salt. To finish, pound mixture thoroughly with the back of a spoon to fully release all of the flavors. Add a little bit of the reserved water if necessary.

Yield: 1/2 cup.

Store in a well-sealed glass container in the refrigerator for 2 to 3 months.

Relax. Eat Well.

Friday, March 11, 2011

Sweet Corn and Black Bean Cakes with Cilantro Almond Aioli


Whew, that is quite the title. Maybe Sweet Beans with Green, instead? Nah, I'll stick with what I've got.

I've been on a black bean kick lately. I like them mixed with a sweeter vegetable, such as sweet potato or golden corn. This dish would work even better in the summer when the corn is tall, but sometimes you just have to break away from the root vegetables when it is MARCH and STILL SNOWING. Ok, I'm done.

For a little info on soaking and cooking beans from dried, check out this post. The same basic method for cooking all beans applies, although the cooking time varies depending on the size.


I served these petite cakes as an appetizer with a dallop of aioli on top, but they could be the main show as well in a larger format with some rice and greens on the side. I like the idea of aioli, but don't appreciate the massive amounts of oil involved. This version uses soaked raw almonds that are creamed into a smooth base and spiked with a latino beat: cilantro, lime, garlic and cayenne. Once they have soaked, it easy to squeeze gently to pop off their skins. They look so funny lying there all naked!


The date adds a sweetness that balances the acidity of the lime and pungency of the garlic. I love using dates in raw concoctions because they bring loads of fiber, a modest dose of potassium and TONS of depth. I love the medjool variety which is often found in the produce section as they are moist, rich and malty.


Sweet Corn and Black Bean Cakes
Serves 6

Ingredients
1 tablespoon ground flax seed
2 cloves garlic, minced
½ jalepeno, minced (or less, depending on heat of your particular pepper)
¼ red onion, chopped
½ cup cilantro, roughly chopped
1 /2 tsp cumin
2 cups black beans
½ cup cornmeal
1 cup corn
2 tsp. honey
Salt and black pepper to taste
Coconut oil for cooking

Directions
Place ground flax in a small bowl with 3 tbs water and let sit while you prepare the rest of the ingredients.
Place onion, garlic and jalapeƱo in the food processor and pulse to mince.  Add cilantro, cumin, cornmeal, honey and 1 cup of black beans. Process until fairly smooth and blended. Transfer to a large bowl and add flax mixture, corn and remaining cup of beans. Mix to combine and season with salt and pepper to taste.
Heat a medium cast-iron pan over medium heat with 1 tbs. of coconut oil. Shape patties with your hands and fry for 3-4 minutes per side, or until golden brown. These work well as mini cakes for a cute appetizer topped with Raw Almond Cilantro Aioli (recipe below). 

Can be made in advance and fried just before serving, or shaped and baked if serving more guests. 


Raw Almond Cilantro Aioli
Serves 8

Ingredients
1 cup raw almonds, soaked overnight
1 medium garlic clove, minced
juice of ½ a lime
1 cup cilantro
1 medjool date, pitted
½ tsp. smoked sea salt
2 tsp. extra-virgin olive oil
¼ cup water
pinch of cayenne
paprika or sumac for garnish


Directions
Pinch soaked almonds to pop skins off.  Place skinned almonds with remaining ingredients in a food processor and process until smooth and creamy, adding water a tablespoon at a time to reach desired consistency. Serve on top of mini sweet corn and black bean cakes with paprika or sumac as a garnish for a darling appetizer. 


Relax. Eat Well.

Saturday, March 5, 2011

Kale Chips


So I planted the seed  last week that I would I was working on a post about Kale Chips, and this time I made quick work on being good to my word. These are absolutely addicting. ADDICTING. But not in the "I can't believe I just ate the whole bag" kind of way. More like "woah I can't believe I just devoured a whole head of kale" internal dialogue. Not a bad trade. I'll take it.


I love to make these extra garlicky and spicy with a hefty pinch of habanero flakes (thanks Dulce!), but they can certainly be tamed down with just a touch of red pepper flakes, or none at all. I have used a number of different kale varieties, and all have been wonderful, although I think purple kale is still my favorite. Have fun exploring Lacinto (or dinosaur) kale as well as the traditional green curly kale as well. All wonderful AND chock full of amazing nutrients.


I could go on forever, but I will attempt to convince you of Kale's nutritional prowess in just a few sentences. Kale is a cruciferous vegetable that falls under the "hearty green" category rich in chlorophyll, Vitamin K, C, A, and iron. It's insoluble fiber content helps bind with bile in the digestive tract and effectively cleanse and detoxify the body of built-up toxins. It is extremely rich in caretonoids and flavonoids (two types of antioxidants) that have been shown to protect against cancer and lower cholesterol. Lastly, due to it's Vitamin K and Omega-3 content, it is extremely anti-inflammatory, helping ease oxidative stress within the system and promote over-all health. Ok ok, I'm done. I hope you are convinced.


When tossing the kale in the oil, you are looking to rub it in gently without massaging or breaking down the kale's structure (which you intentionally do when making a raw kale salad). You are looking for a slightly oiled feeling, but not at all greasy. I like to start with less oil and add more if needed, to find just the perfect amount. This may be tricky at first, but you will find your preferred oil level after you try it once, and will have it all figured out for the next time.

Italian Baked Kale Chips
Serves 4 (or 1, in my case)

Ingredients

1 head of kale (your favorite variety)
1 tsp. olive oil
1 tsp garlic granules
1 tsp. onion powder
1/2 tsp. salt
1 tbs. nutritional yeast
1/2 tsp. paprika
red pepper flakes to taste

Directions

Preheat oven to 300 degrees.

Wash kale, and dry very well. Tear into large pieces, removing tough stems. Place in a large bowl with remaining ingredients and toss to coat. If you need a dash more oil, add it now and work it in lightly.  

Place on a large baking sheet (or two) in a single layer. Bake in oven for 10 minutes, remove, gently toss, and continue to cook for 5 minute intervals until dry and crispy (usually between 20-30 minutes). I find that a longer cooking time at a lower temperature results in chips that hold their crispiness.

Note: If you have access to a dehydrator, these make a great raw snack if dehydrated at 105 degrees for 2 hours.  Keeping food below 105 degrees preserves the active enzymes and more fragile vitamins and minerals. 


Relax. Eat Well.